JavaScript Overview
JavaScript is very popular now a days due to its multipurpose means JS can handle client as wells server side use a scripting language used for developing applications including client-side, server-side, and database interactions.
It is an open-source, cross-platform language that supports functional, imperative, structural, and object-oriented programming paradigms. Known for its lightweight nature, developers can interpret or just-in-time compile JavaScript, depending on the environment in which they use it.
Key Features of JavaScript
- Lightweight and Interpreted: When browsers use JavaScript, an interpreter translates it line-by-line.
- Compiled: On the server side or when working with databases, developers can compile JavaScript. The V8 engine from Google is one of the most widely used compilers for JavaScript.
- Just-in-Time (JIT) Compilation: This method improves performance by allowing JavaScript to load, build, and process instantly in the browser.
Uses of JavaScript
- Client-Side Development: we can directly include along with HTML to improve user experience and interaction in client-side web development.
- Server-Side Development: Now a days JavaScript has grown in strength as a server-side programming tool with the introduction of Node.js, allowing the development of scalable network applications.
- Database Interactions: JavaScript, often through environments like Node.js, is used to interact with databases such as MongoDB
- Animations: Use JavaScript alongside technologies like Flash to create rich, animated web content.
The Purpose of Using JavaScript with HTML in Web Development
In web development, JavaScript is necessary to improve the functionality and interaction of web pages.. Here are some key purposes of using JavaScript with HTML:
- Reduces Server Burden: JavaScript helps to minimize server load by handling client-side interaction.
- Client-Side Scripting: JavaScript operates as a client-side script, which means it runs directly in the user’s browser.
Key Functions of Client-Side Scripting
- Manipulating the HTML DOM:
- Adding elements to the page.
- Removing elements from the page.
- Modifying data within elements.
- Managing data validation within elements.
- Handling Browser-Level Operations:
- Managing the browser’s history.
- Setting and retrieving location details.
- Verifying plugin support.
Common Issues with JavaScript in Web Development
Although JavaScript is an extremely strong language, there are few drawbacks. Here are a few typical problems that developers may go into:
- Browser Compatibility: Different browsers may interpret JavaScript differently, leading to inconsistencies.
- Security Concerns: JavaScript can be vulnerable to various security issues, such as cross-site scripting (XSS).
- Memory Leaks: Improper management of resources can lead to memory leaks, which can degrade performance over time.
- Complex References: JavaScript can be complex when dealing with references, particularly with objects and functions.
- Frequent DOM Manipulations: Extensive manipulation of the Document Object Model (DOM) can lead to performance issues.
- Navigation Issues: Managing browser navigation and history can be tricky and error-prone.
- Tedious Operations: Some operations in JavaScript can be slow and cumbersome.
- Data Binding: JavaScript’s data binding capabilities can be limited compared to some modern frameworks.
- Limited OOP Support: JavaScript does not fully support all object-oriented programming (OOP) features.
- Extensibility Issues: Extending JavaScript functionality can sometimes be difficult.
- Weak Typing: JavaScript is weak type programming language .
Despite these challenges, JavaScript remains an essential tool for creating dynamic and interactive web applications.
How to Use JS in HTML Pages
HTML pages can incorporate JS in several ways:
- Inline Technique: In the inline technique, you define JavaScript functions directly within HTML elements. Here are some key points:
- Defined for Every Element: Write JavaScript code directly in the
onclick,onchange, or similar attributes of HTML elements. - Non-Reusable: These functions apply only to the specific elements you define and cannot reuse across the page.
- Element-Specific: Tailor the JavaScript code to individual elements, making it suitable for unique, one-off interactions.
Embedded Technique: In this technique, JS is placed within a <script> tag inside the HTML document. This allows for more organized and reusable code within the same file.
Example of Embedded JavaScript:
<!DOCTYPE html>
<html>
<head>
    <title>Embedded JavaScript Example</title>
    <script>
        function showMessageEmbedded() {
            alert('Hello I am from embedded script!');
        }
    </script>
</head>
<body>
    <button onclick="showMessageEmbedded()">Click Me</button>
</body>
</html>
External File Technique: Store JS in a separate external .js file and integrate it with your HTML. This method promotes reusability and organizes code more cleanly.
Example of External JavaScript:
<html>
<head>
    <title>External JavaScript Example</title>
    <script src="script.js"></script>
</head>
<body>
    <button onclick="showMessageExternal()">Click Me</button>
</body>
</html>
In script.js:
function showMessageExternal() {
    alert('This is example of external!');
}
Where Should You Embed JS – Head or Body?
JS can be embedded in different parts of an HTML document, each serving a specific purpose:
- Embedding Script in the Head Section
- Purpose: Use this when you want the script to load into memory as the page loads but execute only when called.
- Usage: Ideal for functions that are triggered by user actions (e.g., button clicks) or other events that occur after the page has loaded.
<!DOCTYPE html> <html> <head> <script> function greet() { alert('Hello from the head section!'); } </script> </head> <body> <button onclick="greet()">Click Me</button> </body> </html> - Embedding Script in the Body Section
- Purpose: Use this when you want the script to execute as soon as the page loads.
- Usage: Suitable for scripts that manipulate the content immediately or initialize components that need to be ready when the page is displayed.
<!DOCTYPE html> <html> <head> <title>Body Script Example</title> </head> <body> <script> document.addEventListener('DOMContentLoaded', function() { alert('Hello from the body section!'); }); </script> </body> </html> - Using External JavaScript Files
- Purpose: Use this for better organization, reusability, and cleaner HTML.
- Usage: Recommended for larger scripts or when the same script is used across multiple pages.
<!DOCTYPE html> <html> <head> <title>External Script Example</title> <script src="script.js"></script> </head> <body> <button onclick="greet()">Click Me</button> </body> </html>In script.js:function greet() { alert('Hello from an external file!'); }
Recommendations
- Head Section: Use for scripts that need to be available but not executed immediately.
- Body Section: Use for scripts that need to run as soon as the page loads.
- External Files: Use for modular, reusable, and maintainable code.
Scripts outside the HTML document scope are not recommended as they can lead to poor code organization and maintenance challenges.
What is Strict Mode in JavaScript?
JavaScript provides a range of tools and techniques for programming. Code inconsistency might result from developers working on the same project from various places using different shortcuts to handle distinct functionality.
JavaScript should be enabled in Strict Mode to resolve this issue. Strict Mode helps to ensure consistent and error-free code by enforcing a stricter set of restrictions.
You can enable Strict Mode by including the directive “use strict” at the beginning of your JavaScript code. When Strict Mode is enabled, the browser uses ECMAScript (ECMA) rules to verify and analyze the code..
For example, without Strict Mode, the following code is valid:
<script>
 function f1(){
   x = 20;
   document.write("x=" + x);
 }
 f1();
</script>
In this example, the variable x is used without being declared. While JS allows the use of undeclared variables, it is not recommended. Using Strict Mode prevents such practices, ensuring better coding standards and fewer errors.
To enable Strict Mode, simply add “use strict” at the beginning of your script:
<script>
 "use strict";
 function f1(){
   let x = 20;
   document.write("x=" + x);
 }
 f1();
</script>
By using Strict Mode, you help ensure that your code is cleaner, more consistent, and easier to debug.
How Can JavaScript Access HTML Elements?
JavaScript interacts with HTML elements through the Document Object Model (DOM). By manipulating the DOM, JavaScript can transform a static HTML structure into a dynamic one. Here are some common methods to access and manipulate HTML elements using JavaScript:
Accessing Elements Using the DOM Hierarchy
HTML elements on a page can be accessed using the DOM hierarchy. This native JavaScript technique is both fast and efficient. However, if the position of any element in the DOM changes, you must update the index position in your code accordingly.
Syntax Examples:
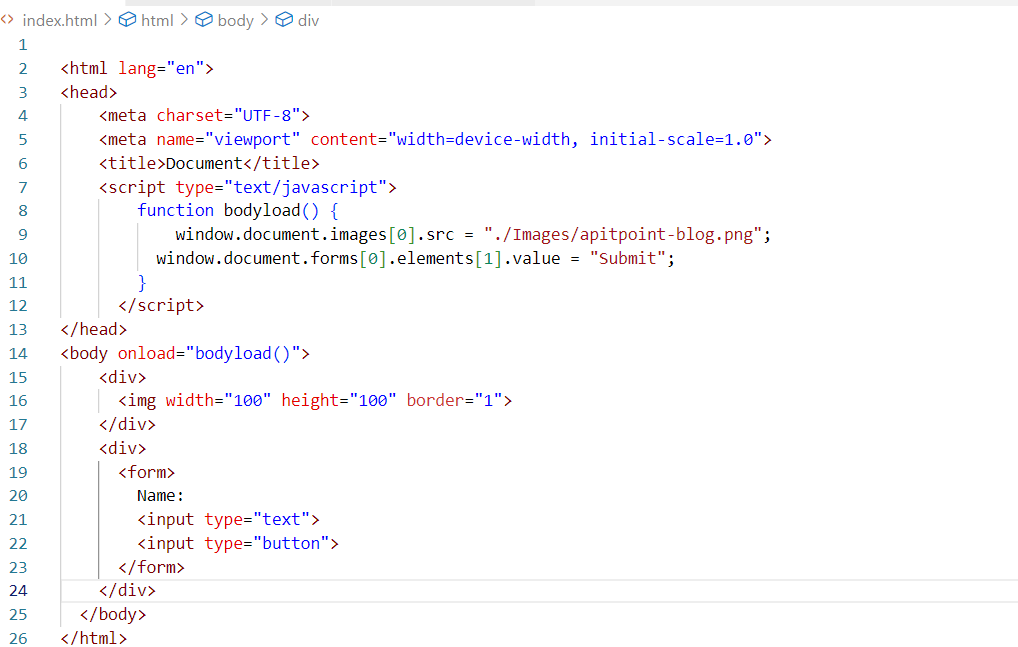
window.document.images[0]window.document.forms[0].elements[1]
Example Code:
<html>
<head>
  <title>Reference</title>
  <script type="text/javascript">
    function bodyload() {
      window.document.images[0].src = "../Images/shoe.jpg";
      window.document.forms[0].elements[1].value = "Submit";
    }
  </script>
</head>
<body onload="bodyload()">
  <div>
    <img width="100" height="100" border="1">
  </div>
  <div>
    <form>
      Name:
      <input type="text">
      <input type="button">
    </form>
  </div>
</body>
</html>


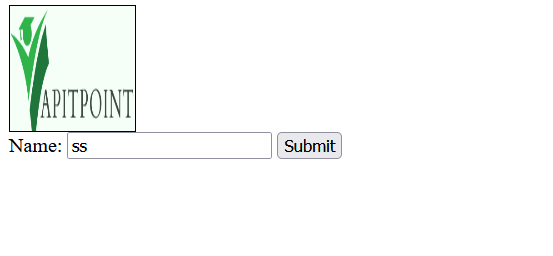
In this example, the bodyload function accesses and manipulates the first image and the second element of the first form on the page.
By understanding and utilizing the DOM hierarchy, you can effectively access and manipulate HTML elements with JavaScript, making your web pages more interactive and dynamic.
Keywords:
JavaScript DOM manipulation, access HTML elements with JavaScript, dynamic HTML with JavaScript, JavaScript DOM hierarchy, interactive web pages with JavaScript.
Accessing HTML Elements by Reference Name
JavaScript allows you to access HTML elements using reference names. This method can simplify code, especially when dealing with named elements. Here are the key points and an example to demonstrate this approach:
Key Points:
- Every element can have a reference name.
- You can access elements directly by using their reference names.
- When referring to a child element, you must access it through its parent element.
- Multiple elements can share the same reference name.
Example Code:
<html>
<head>
  <title>Reference</title>
  <script type="text/javascript">
    function bodyload() {
      pic.src = "../Images/shoe.jpg";
      frmHome.btnSubmit.value = "Submit";
    }
  </script>
</head>
<body onload="bodyload()">
  <div>
    <img name="pic" width="100" height="100" border="1">
  </div>
  <div>
    <form name="frmHome">
      Name:
      <input name="txtName" type="text">
      <input name="btnSubmit" type="button">
    </form>
  </div>
</body>
</html>
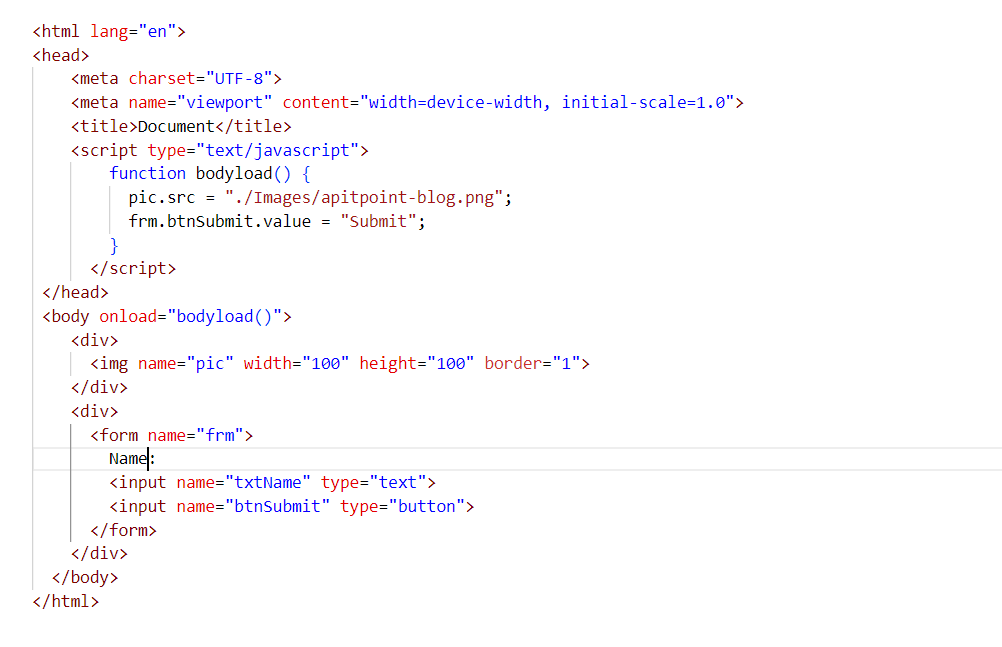
In this example, the bodyload function accesses and manipulates elements using their reference names. The image is referenced by pic, and the form elements are accessed through frmHome.
By using reference names, you can efficiently target and manipulate specific elements within your HTML, enhancing the interactivity and functionality of your web pages.
Keywords:
The reference name, access HTML elements by name, manipulate HTML elements, JS form manipulation, interactive web pages with JS.

Accessing HTML Elements by Using ID
Every HTML element can have a unique identification (ID), allowing you to access and manipulate elements efficiently using JavaScript. Here’s a detailed explanation and an example to demonstrate this approach:
Key Points:
- Every element in HTML can have a unique ID.
- You can access an element by using its ID.
- The
getElementById()method is used to access elements by their ID. - You can directly access any child element without referring to its parent.
Example Code:
<!DOCTYPE html>
<html>
<head>
  <title>Reference by ID</title>
  <script type="text/javascript">
    function bodyload() {
      document.getElementById("pic").src = "path/to/your/image.jpg";
      document.getElementById("btnSubmit").value = "Submit";
    }
  </script>
</head>
<body onload="bodyload()">
  <div>
    <img id="pic" width="100" height="100" border="1">
  </div>
  <div>
    <form id="frmHome">
      Name:
      <input id="txtName" type="text">
      <input id="btnSubmit" type="button">
    </form>
  </div>
</body>
</html>
In this example, the bodyload function accesses and manipulates elements using their unique IDs. The image is referenced by pic, and the form elements are accessed directly by their IDs.
By using unique IDs, you can efficiently target and manipulate specific elements within your HTML, enhancing the interactivity and functionality of your web pages.
Referencing Elements by Using Tag Name
In this we can utilize multiple element using tag name . When you need to work with multiple items of the same kind, this approach comes in handy. Here is a thorough description of this method along with an example:
Key Points:
- Several items are accessible by their tag name..
- The
getElementsByTagName()method returns a collection of elements. - For batch actions on components of the same type, this approach is helpful..
Syntax:
document.getElementsByTagName("tagName")Example Code:
<!DOCTYPE html>
<html>
<head>
  <title>Reference by Tag Name</title>
  <script type="text/javascript">
    function bodyload() {
      var tags = document.getElementsByTagName("img");
      alert("Total Number of Images = " + tags.length);
    }
  </script>
</head>
<body onload="bodyload()">
  <div>
    <img id="pic1" width="100" height="100" border="1">
  </div>
  <div>
    <form name="frmHome">
      Name:
      <input id="txtName" type="text">
      <input id="btnSubmit" type="button">
    </form>
  </div>
  <img id="pic2" width="100" height="100" border="1">
</body>
</html>
In this example, the bodyload function accesses all <img> elements on the page using the getElementsByTagName("img") method and alerts the total number of images.
By using the tag name method, you can efficiently perform operations on multiple elements of the same type, enhancing the flexibility and dynamism of your web pages.
Accessing HTML Elements by Using Class Name
In JS, you can access elements by their class name. This method is useful when you need to manipulate multiple elements that share the same class. Here’s an explanation and an example to demonstrate this approach:
Key Points:
- Access elements by referring to their class name.
- The
getElementsByClassName()method returns a collection of elements.
Example Code:
<!DOCTYPE html>
<html>
<head>
  <title>Reference by Class Name</title>
  <script type="text/javascript">
    function bodyload() {
      var classes = document.getElementsByClassName("effects");
      alert("Total number of elements using class 'effects': " + classes.length);
    }
  </script>
  <style>
    .effects {
      background-color: yellow;
    }
  </style>
</head>
<body onload="bodyload()">
  <div>
    <img id="pic" width="100" height="100" border="1">
  </div>
  <div>
    <form name="frmHome">
      Name:
      <input id="txtName" type="text">
      <input class="effects" id="btnSubmit" type="button">
    </form>
  </div>
  <h2 class="effects">Welcome</h2>
</body>
</html>
In this example, the bodyload function accesses all elements with the class name effects using the getElementsByClassName("effects") method and alerts the total number of such elements.
By using the class name method, you can efficiently perform operations on multiple elements that share the same class, enhancing the flexibility and dynamism of your web pages.
Input Techniques
it offers various methods and elements to capture user input.You can categorize these techniques into two main approaches: using the prompt() method and using form input elements. Below, I provide detailed explanations and examples for each approach.
JavaScript Prompt method
The prompt() method creates an input box that lets the user enter a value. It provides a quick and simple way to gather input without the need for a custom input screen.
Prompt Example
Syntax:
prompt("Your Message", "default_value");
• Return Values:
  o Value: When a value is provided and OK is clicked.
  o Empty String: When no value is provided and OK is clicked.
  o Null: When Cancel is clicked, with or without a value.
Example:
<!DOCTYPE html>
<html>
<head>
  <title>Prompt</title>
  <script>
    function CreateClick() {
      var folderName = prompt("Folder Name:", "new_folder");
      var msg = document.getElementById("msg");
      if (folderName === "") {
        document.write("Name can't be Empty");
      } else if (folderName === null) {
        document.write("Input Canceled");
      } else {
        msg.innerHTML += "Folder Created By Name: " + folderName + "<br>";
      }
    }
  </script>
</head>
<body>
  <button onclick="CreateClick()">Create New Folder</button>
  <p id="msg"></p>
</body>
</html>
2: Form Input Elements
Form input elements are more suitable when you need to capture more structured and regular input types such as text, numbers, selections, and other complex data types. Commonly used form elements include
Summary
- What is JS? A programming language that enables interactive web pages.
- Why JS? It enhances user interaction and dynamic content on websites.
- Integrating JS into HTML: we can directly include HTML documents or linked as external files.
- References HTML DOM Elements: JavaScript can access and manipulate HTML elements using various methods.
- Input and Output Methods: Includes prompt(), form input elements, and various output techniques like alert(), console.log(), innerHTML, etc.
Keywords: input methods, JavaScript prompt, form input elements, DOM manipulation, interactive web pages with JavaScript
for more refence please visit apitpoint
Note: Featured pic credit: freepik.com


