Swagger in ASP.NET MVC Web API
It is basically used for Test the API and documentation it allows you to describes the structure of your APIS so that system can read. Swagger is mainly come with asp.net core but we can also integrate swagger in asp MVC web API in this blog we can understand how we integrated swagger in asp MVC web api easily we have to follow some step
Implementing Swagger in an ASP.NET MVC 5 Web API project can significantly enhance your API documentation and testing capabilities. Here’s a step-by-step guide to help you set it up:
Step 1: Create a New ASP.NET MVC 5 Web API Project Visual Studio 2019
- Open Visual Studio 2019 .
- Create a New Project:
- Select ASP.NET Web Application .
- Choose MVC and check Web API.
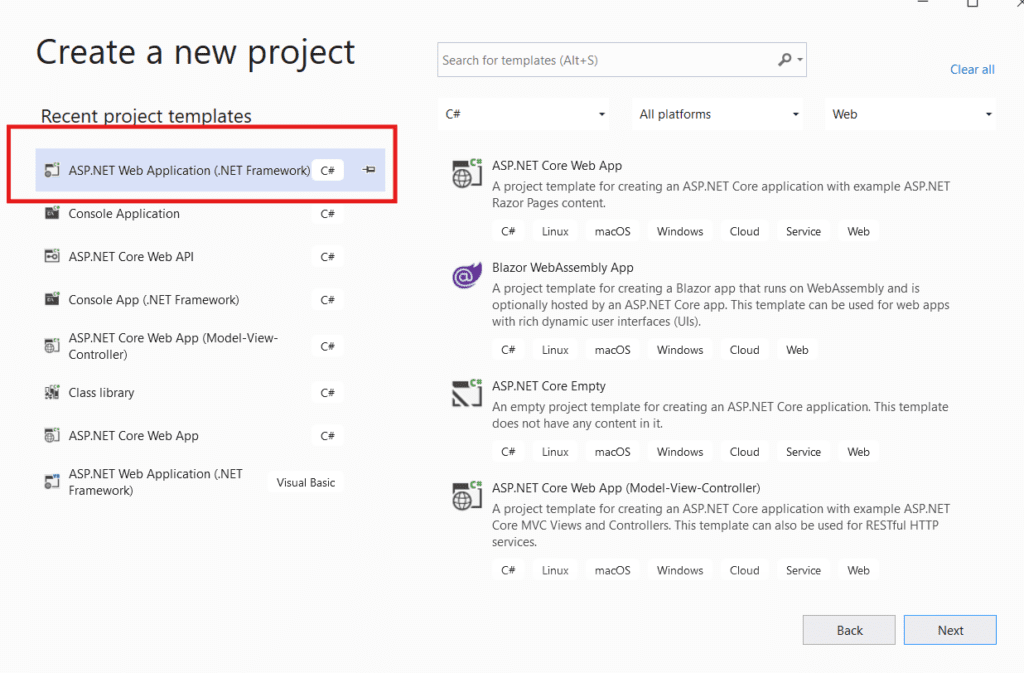
In this step, we need to create a project, so choose ASP.NET Web Application (.NET Framework) option.
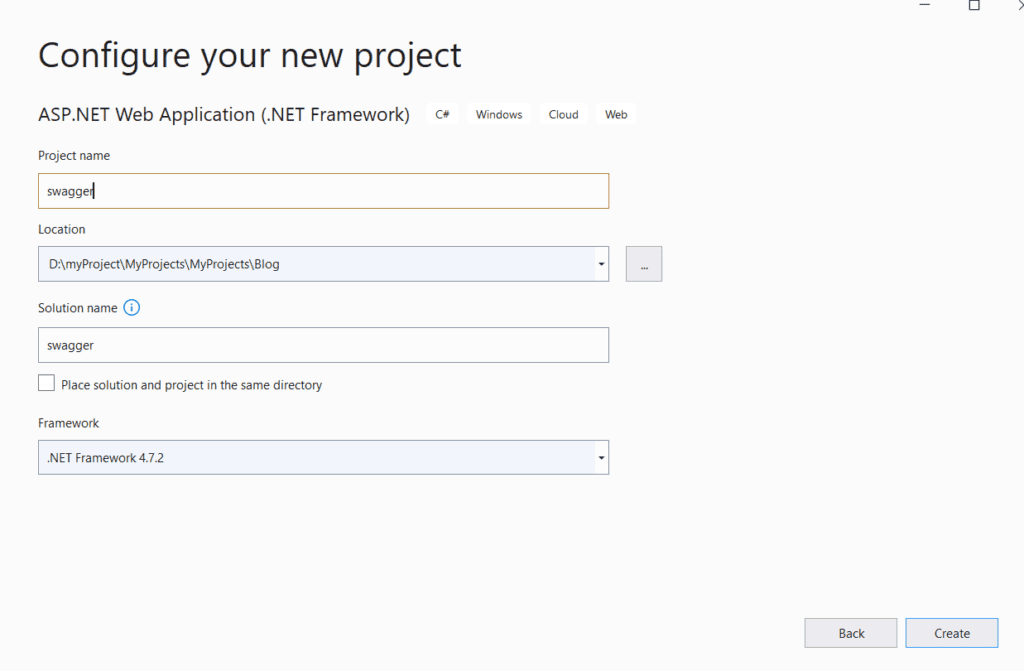
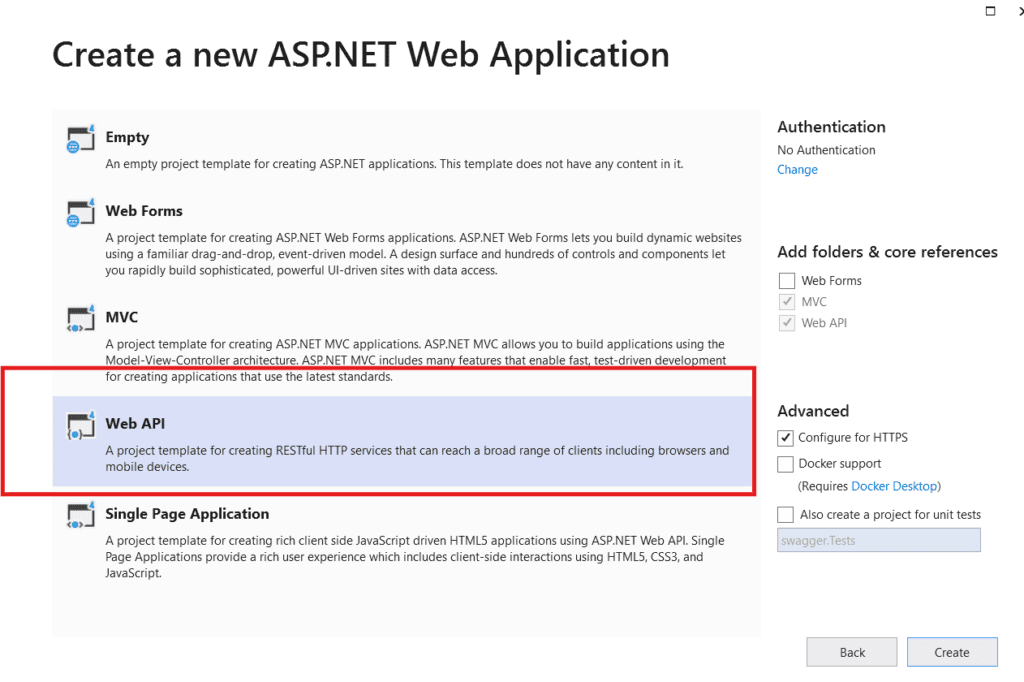
Step 2: Install Swagger
- Open the Package Manager Console in Visual Studio:
- Go to Tools > NuGet Package Manager > Package Manager Console.
- Install Swagger: Run the following command in the console:
we need to install the package named Swashbuckle with following command: Install-Package Swashbuckle
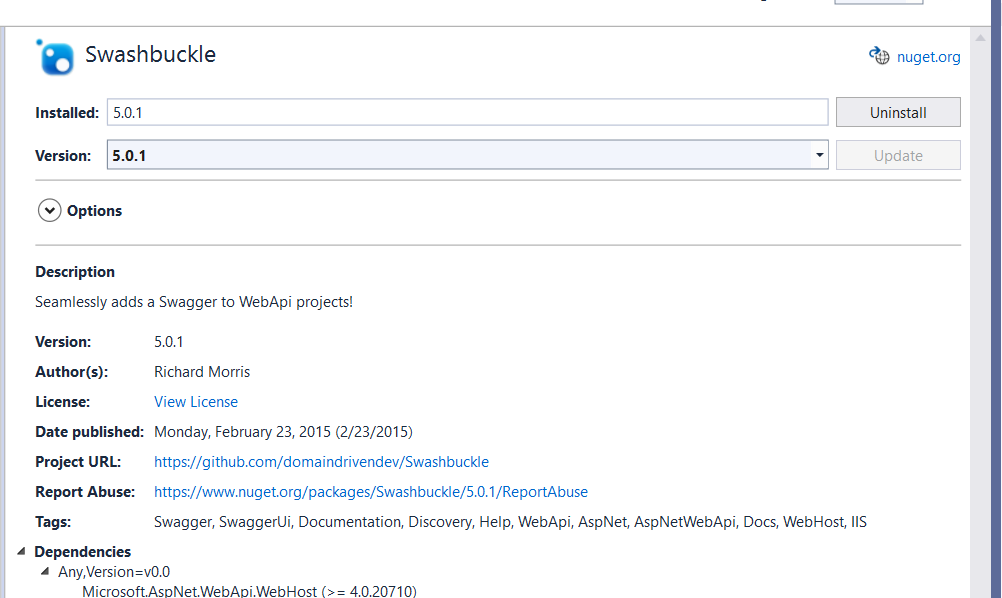
Step 3: Configure Swagger
- Open the SwaggerConfig.cs file:
- After installing the package, a SwaggerConfig.cs file is created in the App_Start folder.
- Modify SwaggerConfig.cs: You can customize the settings. Here’s a basic configuration:
once we install Swashbuckle package , a swaggerconfig.cs file is created in App_Start folder so you need to modified some lines of code .
using System.Web.Http;
using WebApi.Swagger;

public class SwaggerConfig
{
    public static void Register()
    {
        var thisAssembly = typeof(SwaggerConfig).Assembly;

        GlobalConfiguration.Configuration
            .EnableSwagger(c =>
            {
                c.SingleApiVersion("v1", "Your API Title");
                c.IncludeXmlComments(GetXmlCommentsPath());
            })
            .EnableSwaggerUi();
    }

    private static string GetXmlCommentsPath()
    {
        return System.String.Format(@"{0}\bin\YourApiName.xml", System.AppDomain.CurrentDomain.BaseDirectory);
    }
}
Step 4: Enable XML Comments (Optional)
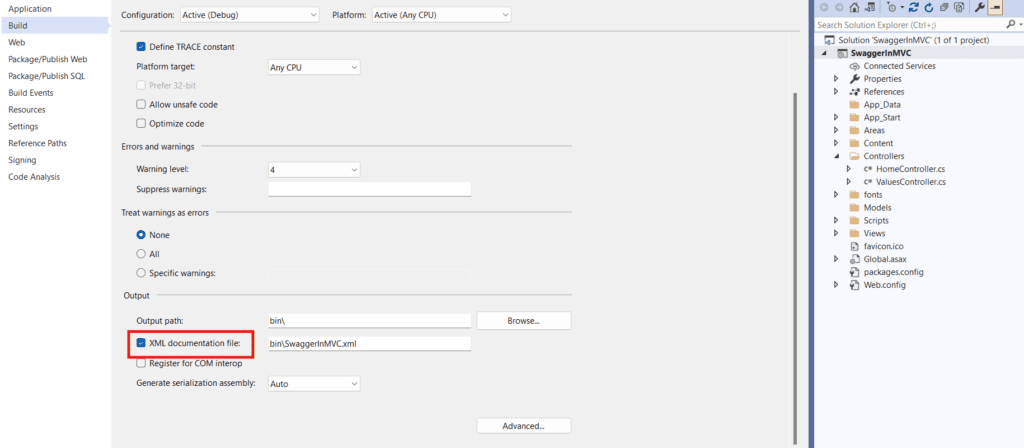
- Enable XML Documentation:
- Right-click on your project in Solution Explorer and select Properties.
- Go to the Build tab and check XML documentation file.
- Name it (e.g., YourApiName.xml).
Step 5: Initialize Swagger in Application Start
Open Global.asax.cs: Add the Swagger registration in the Application_Start method in this step open this file configure global. Sax file see below code .
using System;
using System.Collections.Generic;
using System.Linq;
using System.Web;
using System.Web.Http;
using System.Web.Mvc;
using System.Web.Optimization;
using System.Web.Routing;

namespace SwaggerInMVC
{
    public class WebApiApplication : System.Web.HttpApplication
    {
        protected void Application_Start()
        {
            AreaRegistration.RegisterAllAreas();
            GlobalConfiguration.Configure(WebApiConfig.Register);
            FilterConfig.RegisterGlobalFilters(GlobalFilters.Filters);
            RouteConfig.RegisterRoutes(RouteTable.Routes);
            BundleConfig.RegisterBundles(BundleTable.Bundles);

        }
    }
}
Step 6: Run and Test Your Application
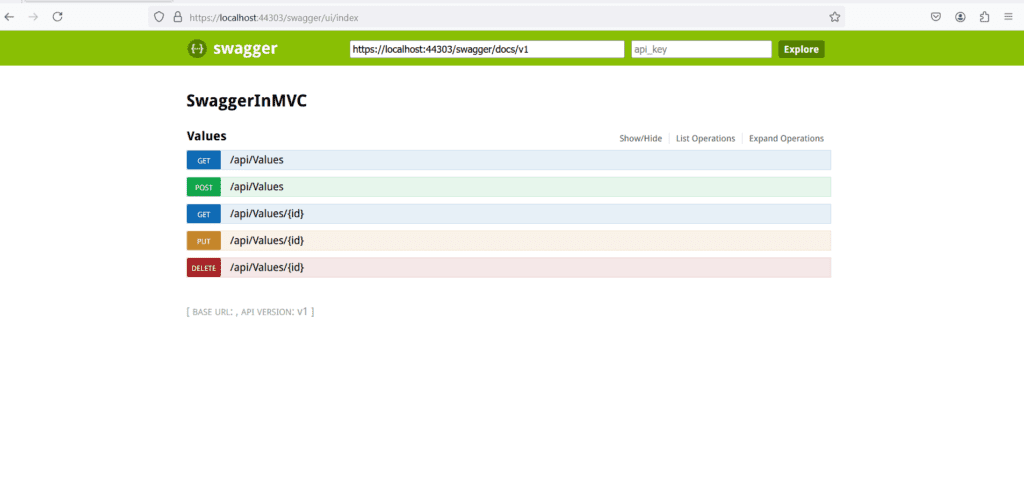
- Start your project by pressing F5 or Ctrl+F5.
- Access Swagger UI: Navigate to http://localhost:<port>/swagger/ui/index (replace <port> with your application port).
Conclusion
Follow these steps, you have a functional Swagger implementation in your ASP.NET MVC 5 Web API project. This will help you document and test your API effectively
Reference:
for more details please visit apitpoint


